Using H2 storage in oxd#
H2 configuration in oxd#
The storage used in oxd can be either H2 or Redis. To use H2 database as storage in oxd-server we need to follow below step:
-
In
/opt/oxd-server/conf/oxd-server.ymlfile of installed oxd-server set following parameters.storage: h2 storage_configuration dbFileLocation: /opt/oxd-server/data/oxd_db
By default, the oxd-server persists data inside H2 embedded database. On your disk, it should look like an oxd_db.mv.db file. In dbFileLocation parameter of oxd-server.yml the path is set where oxd_db.mv.db is generated.
H2 tools to view/edit data in H2 DB#
The oxd-server persists data inside H2 embedded database, it should look like an oxd_db.mv.db file on disk.
You can use any convenient database viewer to view/edit data inside the database. We recommend to use the browser-based viewer H2:
- Download http://www.h2database.com/html/download.html
- Run it (in "Platform-Independent zip" case it is as simple as hitting
h2.shorh2.bat)
In the browser, you will see connection details; please specify details as in oxd-conf.json file.
If all is filled correctly, upon "Test Connection" you should see a "Test successful" message like in the screenshot below:
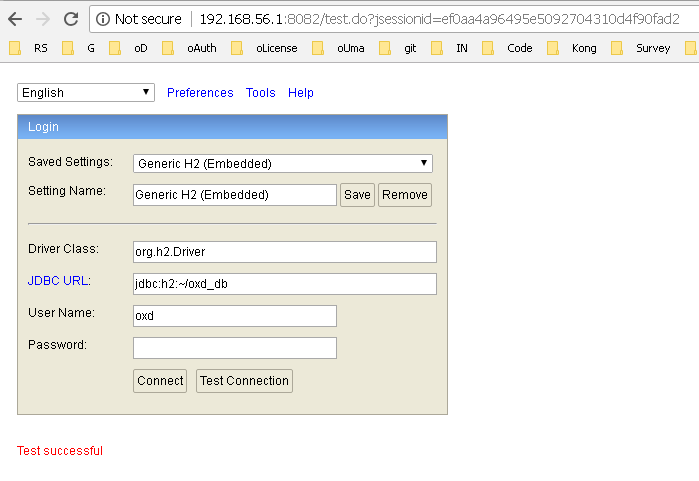
After hitting the "Connect" button, you will be able to view/modify data manually. Please be careful not to corrupt the data inside. Otherwise, oxd-server will not be able to operate in its normal mode.
DBeaver to view/edit data in H2 DB#
We can use Sql clients like DBeaver to view and edit data in database. The steps are:
-
Download, install and start DBeaver.
-
Click on
Database --> New Database Connectionoption on top menu ofDBeaver. This will open a popup window listing many DBs supported byDBeaver.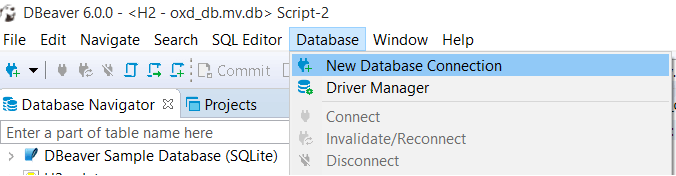
-
On appeared popup select
H2 Embeddeddatabase and then click onNextbutton.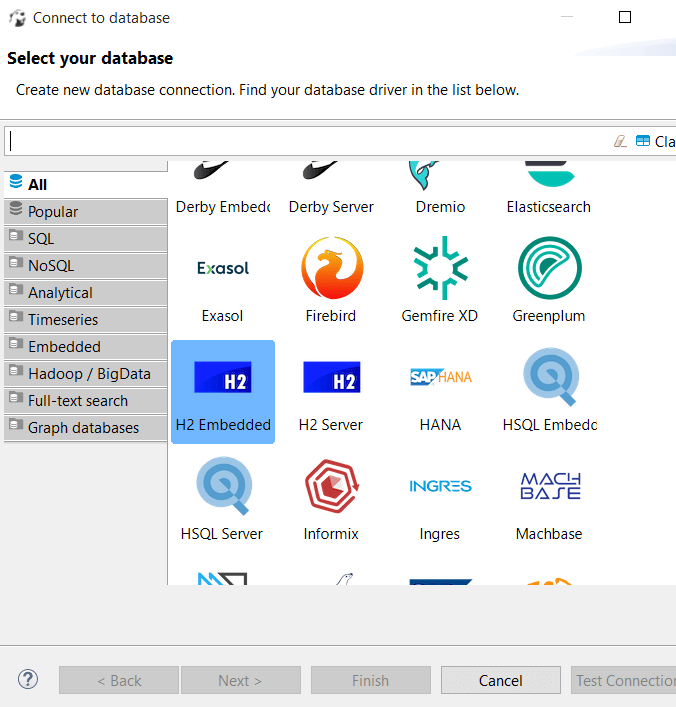
-
On next popup provide path of H2 embedded database (i.e.
oxd_db.mv.dbfile) inDatabase/Schematextbox along with DB username/password. Then click onFinishbutton.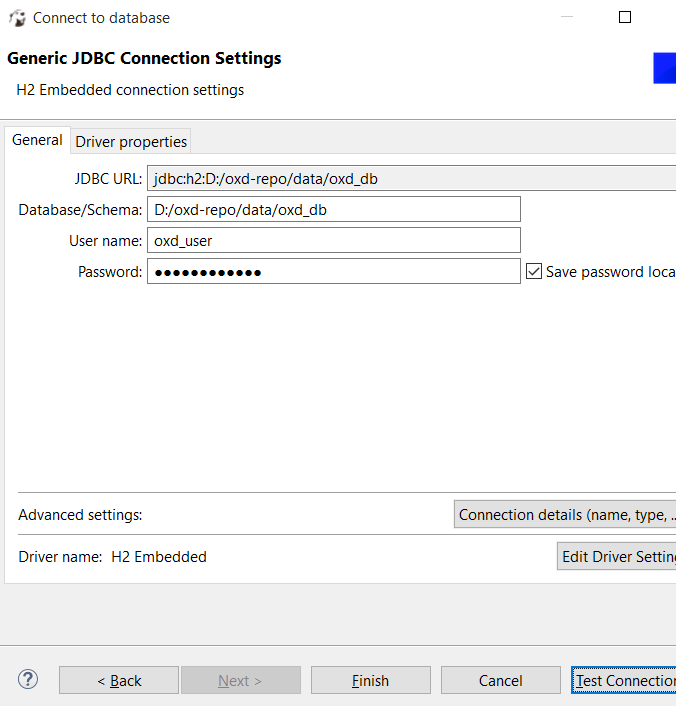
-
The newly created database connection will be shown on
Database Navigator. To connect, right click on it and then click on connect option.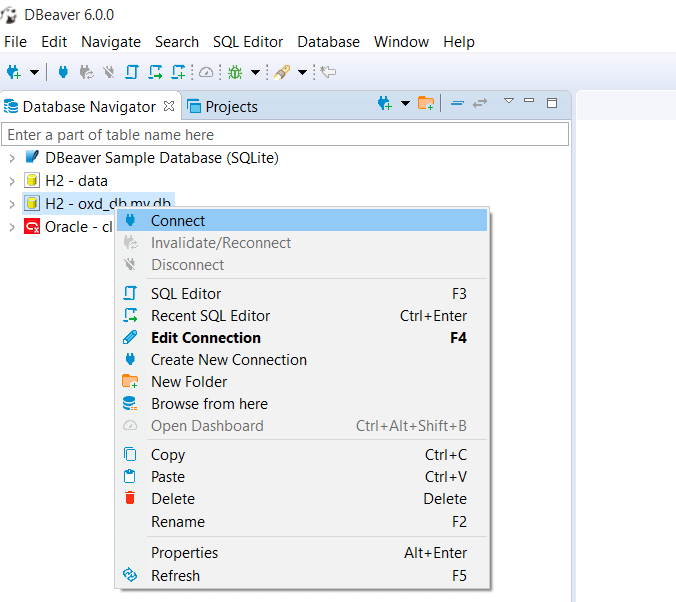
-
To view/edit data doulble click on tables under
PUBLIC --> Tables. This will display the data in tables. The data can also be modified.